It was a chance of fate, as my friend and I were on a trip to the Adirondacks in New York and made a brewery stop before heading home. The brewery was closed, but they had a coffee shop on the top floor open. Once inside, I set my eyes on a dream come true: fresh toaster pastries. They were beautifully decorated and exactly what I needed at the time.
This little guy and a beer (the brewery may have been closed, but the coffee shop had some of their brews!). Good job, Walt Whitman Brewing.
This was a cherry little beauty and I'll never forget it. I added them to my "to make" list and moved on. But then I got to thinking after my kitchen renovation of items I needed to try. Sure enough, it hit me that I'd not given these a go yet. Fascinating journey to get here, I know.
To make my own, I started by setting up my pastry board. The dough can be made in a food processor or by hand, and I chose to work by hand. This is just a pie crust of a drier variety, and pie making is a process I am fairly familiar with given it is how I got into blogging. Doing it by hand takes a bit longer but is not difficult.
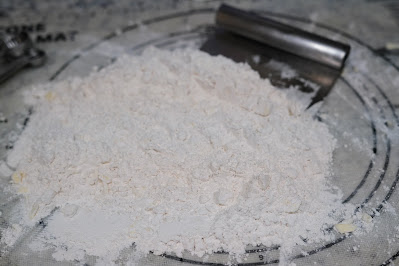
I added flour and salt and mixed it together. Then, I cut the cold butter into squares and added it on top of the flower. The next steps in the process repeat: I used my pastry cutter to cut the butter chunks into smaller pieces, then tossed the flour over them to coat all sides. I repeated this until I had very small chunks of butter. Then, I used my hands, squishing the butter with my fingers and tossing in in the flour until the largest pieces I had were about the size of a pea. The reason I started with the pastry cutter was to keep the dough as cold as possible - hands are warm and can start to melt the butter. Using the pastry cutter as long as possible keeps the butter cold and solid.
The final result looked sandy in consistency.
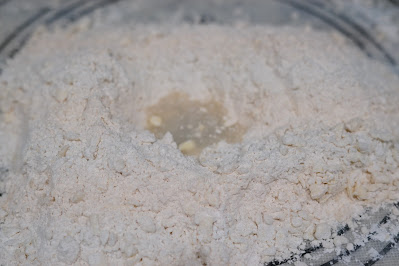
I made a well in the center of the flour pile and added my water. Then, I used my hands to gently add flour to the mixture, slowly adding more. The goal is to create a cohesive piece of dough. If needed, some more flour can be added to make the dough dryer (if it is wet/overly sticky) or water can be added to thin it out (if it is too dry/won't form into one piece).
I formed the dough into a flat circle, covered it with plastic wrap, and placed it in the fridge for an hour (at least 30 minutes is ideal, and overnight is fine, too).
Next, I broke the dough in half and rolled one piece out into a large rectangle.
I rolled it to be about 1/8-1/16" thick. It doesn't hurt to let the dough sit for 5 minutes or so to warm up slightly; colder dough can be harder to roll out. I used my pastry cutter to square up the edges since I needed even shapes.
Next, I cut the dough into 8 even pieces using the pastry cutter. I then topped 4 of the pieces with filling. In my case, I put chocolate pieces and marshmallows in two (S'mores!), and raspberry preserves in the other half. Then I placed the other halves on top of the filling to make a little hand pie.
After topping of the pastries, I used a fork to seal the edges all around.
I repeated this with the other half of dough, then placed them all on a cookie sheet. The final touch was brushing each with egg wash (melted butter works, too). This will give it the golden brown color, as baking without it will give you a light colored dough that doesn't fit typically baked good visual expectations.
They baked for about 25 minutes, then I let them cool slightly before adding topping. For these two varieties, I made a melted chocolate icing for S'mores topped with crushed graham crackers and and a regular glaze with sprinkles for the raspberry ones.
Aren't they cute?
Things I learned here:
- To my surprise, the raspberry was my favorite
- These were better after cooling, which shocked me
- Maybe I don't love a dry dough
I really couldn't stop with the raspberry. And these are basically flat hand pies, so you can do whatever you want. Pumpkin, anyone? Tis the season, after all.
The fact you can customize them and decorate them in cute ways makes these a fun treat. Overall, total work time was around 2 hours, so they're not a terrible investment if you're in the mood to bake. And for me, that was just what I needed.
Toaster Pastries Recipe
Ingredients:
For the dough:
3 cups flour
Instructions:
Ingredients:
For the dough:
3 cups flour
1 cup cold butter
1 teaspoon salt
1 tablespoon water
1 egg, beaten (or melted butter)
For the filling:
For a fruit toaster pastry: 1/2 cup preserves, as desired
For a s'mores toaster pastry: 1/4 cup chocolate chips or chocolate pieces, 2-3 tablespoons marshmallow
For the frosting:
For a thin, white glaze: 2 tablespoons milk or water (you can also use half and half or cream, but will need less sugar), 1/2 cup powdered sugar (use more or less to thicken), sprinkles as desired
For a chocolate glaze: 2 tablespoons milk or half and half, heated for 15-20 seconds in the microwave, 1-2 tablespoons chocolate chips or grated chocolate mixed in, crushed graham crackers as desired
Instructions:
Dough can be prepared in a food processor or by hand. If in a food processor, add flour and salt, then pulse a few times to mix. Cut butter into squares and throw into the food processor. Pulse several times to cut the butter up. Continue until the flour mixture has a sandy consistency, with only small pieces of butter (about the size of a pea). Add water, then pulse until the dough begins to form. If by hand, add flour and salt to a work surface, then mix. Chop butter into cubes, then use hands to squish the butter into smaller pieces and coat them with flour. Continue breaking up the butter pieces until the dough has the consistency of sand. Create a well in the center of the flour, add water, then use hands to mix and form into a flat circle. Wrap in plastic wrap and refrigerate for a minimum of 30 minutes.
Preheat oven to 350 degrees F. Prepare a work space with a layer of flour. Break off half the dough, then roll out to approximately 9 x 13". This is around 1/6-1/8" thick. Trim the edges to form shape into a rectangle, then cut in half lengthwise, then widthwise twice, forming 8 smaller rectangles. Place filling of choice in 4 of the rectangles, then place the other 4 dough pieces over each. Press edges together, then press a fork into dough to seal. Place on a lined baking tray, then brush with egg wash. Bake for 20-25 minutes, until lightly browned.
Allow to cool slightly, then add icing to each. Top with sprinkles or crushed graham crackers.
adapted from homemade pop tarts


No comments:
Post a Comment